Normalised Power Calculation in C#

Normalised Power Calculation in C#

The beginning of my journey to fix FIT files that are missing Training Stress Score (TSS).

Just here for the code? Skip to the end…

Back Story

According to DC Rainmakers article, FIT files automatically uploaded from Zwift to Garmin Connect should get synced with your Garmin device and add to your Training Load.

However, this is not the case with my device (Garmin Fenix 5s) for whatever reason.
On further investigation of the FIT files exported from Zwift, there was no Normalized Power, Intensity Factor or Training Stress Score; all things needed to calculate Training Load.

The simple fix for this is to record your indoor training activity on your Garmin device whilst Zwifting, however, it doesn’t take into account things like elevation changes during your ride.
And being somewhat of a completist, the Zwift workouts that I have already uploaded to Garmin Connect have not added to my total training load and must be fixed!!

Solution

Obviously the only solution is to implement my own solution very specific solution, because the short time I spent searching for an easy way to fix FIT files returned zero results.

Luckily the Garmin FIT SDK is available for developers and I have some C# experience (there are also examples for C, C++ and Java).
Which means I can cobble something together and stick it on the internets for those like myself looking for a way to update their FIT files with Training Load data.

So next step was to work out how to calculate Training Stress Score (TSS), the best article on the topic I found was from slowtwitch.com.
Turned out I needed to calculate Intensity Factor(IF) to calculate TSS and to calculate IF I needed to calculate Normalized Power(NP).

Normalised Power

  • T = time spent at that power level (minutes)
  • P = power output (watts)

NP = ( ( (T x P ^ 4) + … + (T x P ^ 4) ) / 60 ) ^ (1.0 / 4)

Intensity Factor

  • NP = Normalised Power (watts)
  • FTP = Functional Threshold Power (watts)
  • IF = Intensity Factor (%)

IF = NP/FTP

Training Stress Score

  • D = duration (hours)
  • IF = Intensity Factor (% in decimal)
  • TSS = Training Stress Score

TSS = IF^2 x D x 100

Code

The code examples below both use the following example data:
10 minutes at 145 watts
20 minutes at 265 watts
30 minutes at 175 watts
Normalized Power = 216 watts

Inline calculation:

1
2
3
4
5
6
double NormalisedPower = Math.Pow( 
(
(10 * Math.Pow(145, 4)) +
(20 * Math.Pow(265, 4)) +
(30 * Math.Pow(175, 4))
) / 60, 1.0 / 4);

Below is an example of the above as a function to process many input values.
It requires a custom type for readability, however, you could just as easily use a tuple.

1
2
3
4
5
6
7
8
// Custom Type
public struct NormalisedPowerPair
{
public double Time { get; }
public double Power { get; }

public NormalisedPowerPair(double time, double power) => (Time, Power) = (time, power);
}
1
2
3
4
5
6
7
8
9
10
11
12
13
14
15
// Function to parse many values
static double NormalisedPower(NormalisedPowerPair[] normalisedPowerPairs)
{
double normalisedPower = 0;
double accumulatedValue = 0;

foreach (NormalisedPowerPair item in normalisedPowerPairs)
{
accumulatedValue += item.Time * Math.Pow(item.Power, 4);
}

normalisedPower = Math.Pow(accumulatedValue / 60, 1.0 / 4);

return normalisedPower;
}
1
2
3
4
5
6
7
8
// Example use
NormalisedPowerPair[] npPairs = {
new NormalisedPowerPair(10, 145),
new NormalisedPowerPair(20, 265),
new NormalisedPowerPair(30, 175)
};

Console.WriteLine("Normalised Power = " + NormalisedPower(npPairs) + " watts");

Netlify Redirects

Single Page Application Routing

If you enter a specific URL route for your SPA, by default Netlify won’t know what to do with it and your page won’t load.

To fix ths you will need to add a _redirects file to your source directory.

1
2
src
- _redirects

Update your angular.json file so that it gets picked up as an asset.

1
2
3
4
5
6
7
...
"assets": [
"src/favicon.ico",
"src/assets",
"src/_redirects"
],
...

For your SPA you will need to redirect everything back to index.html.
Add the following to the _redirects file.

1
/* /index.html 200

Deploy your app and refresh your page…done.

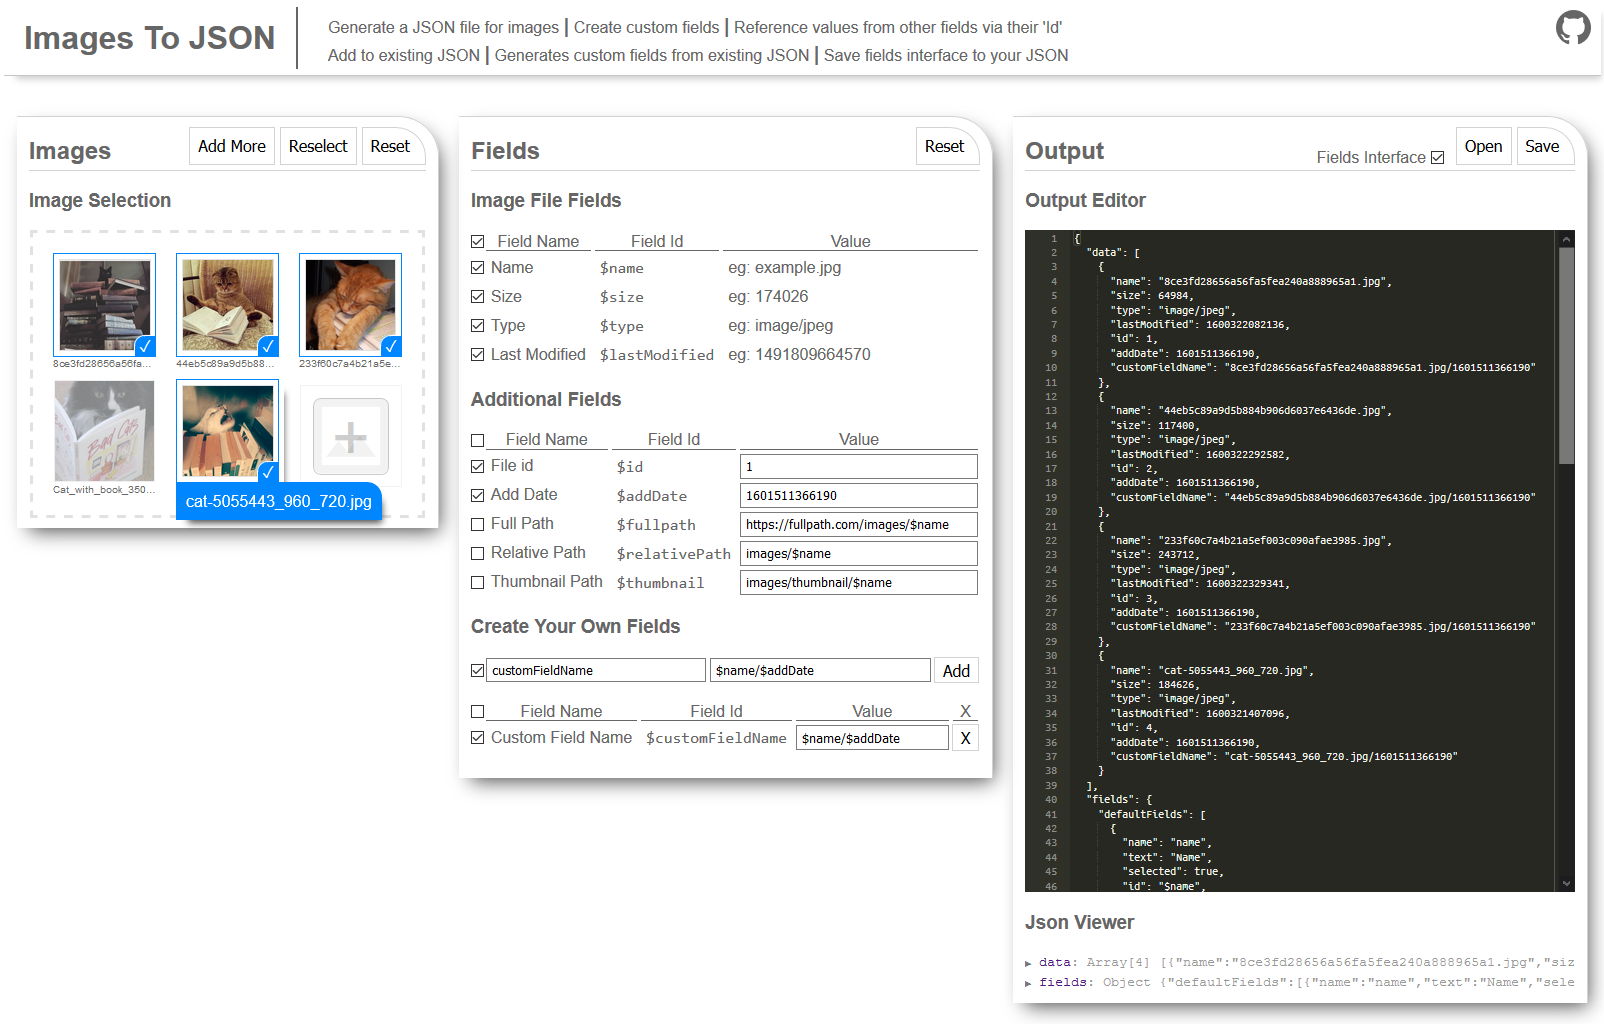
Images To JSON

Create a JSON file for your images

ImagesToJSON is a website for creating/updating JSON files for a selection of images.

  • Generate a JSON file for images
  • Create custom fields
  • Reference values from other fields via their ‘Id’
  • Add to an existing JSON file
  • Generates custom fields from existing JSON
  • Save fields interface to your JSON

Why does it exist?

Images To JSON was developed out of a want to archive a website that had been moved to the Shopify platform.

The original site was built with a headless CMS backend and not wanting to pay hosting fees to preserve the website, all the backend data had to be converted to JSON files.

This was fine for the majority of the text based data as it could be exported from the CMS, however, the data related to images could not and had to be reconstructed.

Requirements

The images JSON file needed to contain all the same data as before:

  • some of that data could be gathered from the file information
  • some of the known required fields data could be derived from file information
  • some fields had not yet been determined, thus needed the ability to create new fields and update the JSON file

Input requirements:

  • somewhere to add image files
  • somewhere to update/create fields for data
  • someway to open previously generated JSON files

Output requirements:

  • somewhere to view the generated JSON data
  • someway to export the JSON file
  • someway to save the field settings for later use

Implementation

The project was developed in Angular and is hosted on Netlify.
The site was divided up into three logical sections:

  • image import
  • field editing
  • JSON output/import

Image Import

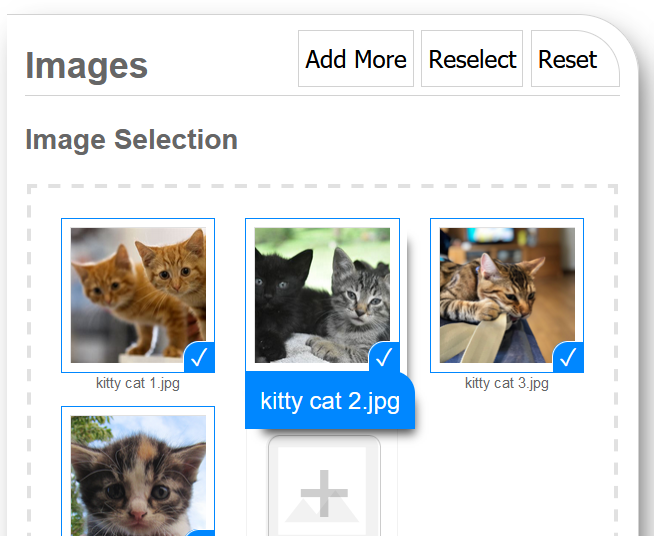
Image import supports ‘drag and drop’ and file brows.

  • once imported, files can be selected and deselected
  • if the file name is cropped, mouse hover displays the full file name
  • if a JSON file is imported, the image import section is populated with dummy images

Field Editing

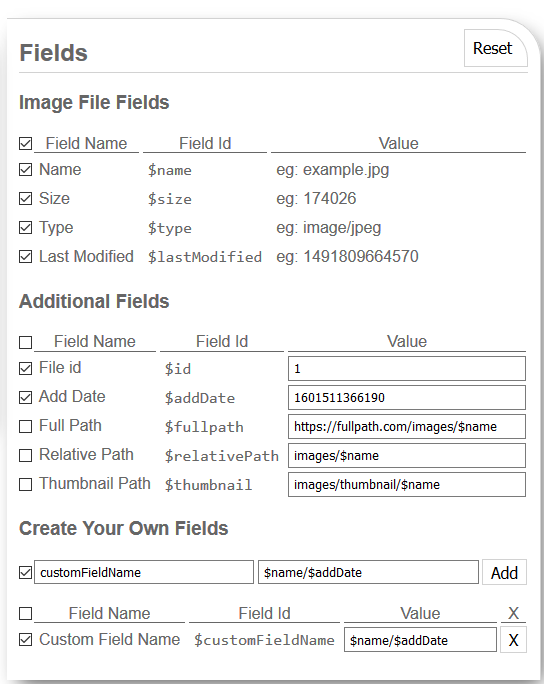
The fields section has three groups:

  • standard file fields
  • commonly used/required fields
  • custom creatable fields

Each field can be toggled to appear in the JSON file.
Fields can contain content from other fields using their $id.

The field settings are stored in local storage for later use or can be exported in the JSON file.

JSON Output

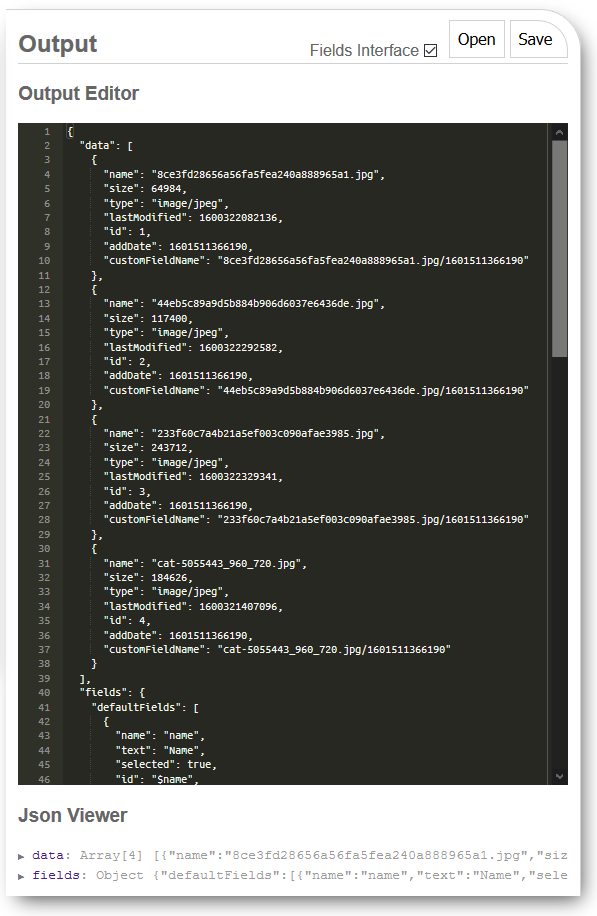
JSON Output is divided into two areas:

  • JSON editor for editing the generated JSON
  • JSON viewer to get a better idea of what the generated JSON contains

JSON files can be saved and opened from this section.
JSON for the fields settings is also available in this section and saving of these settings can be toggled on/off.

Conclusion

The app took way to long to implement, the JSON file could have been created manually in the time that it took to create.

However, generating the JSON programmatically ensured their were no typos and new fields could be added as needed in seconds instead of manually adding them to all the images.

And Rise Community Art has been preserved for future generations.

TCX Fixer

TCX File Repair

C# projects for repairing corrupted TCX files exported from exercise tracking website Strava.

Problem They Solve

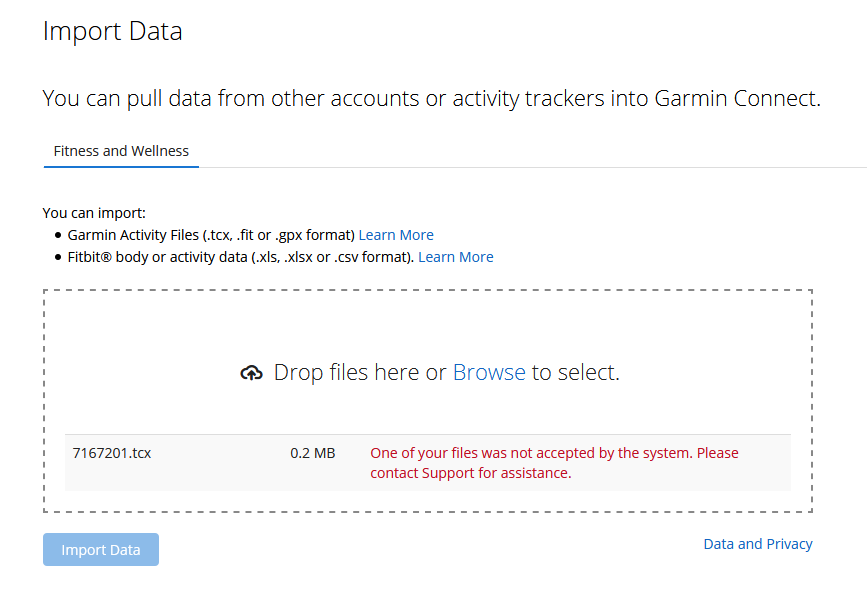
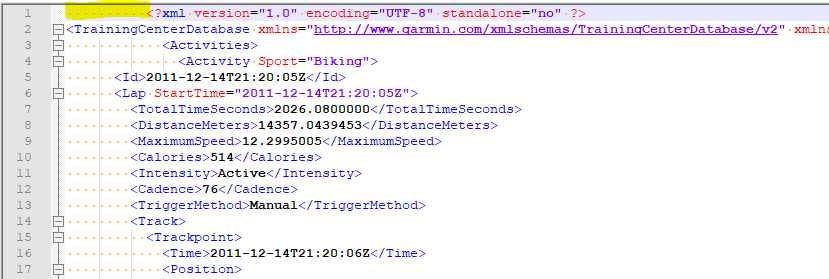
Bulk downloaded tcx files from Strava have leading spaces at the beginning of the file, which Garmin Connect deems as invalid XML with the following error message.

“One of your files was not accepted by the system. Please contact Support for Assistance”

Upon noticing that my Garmin Connect activity history was missing activities that existed in Strava I decided to download the missing activities from Strava.
Downloading activities individually was tedious, so I downloaded all my data.

However, whilst the individually downloaded files uploaded fine to Garmin Connect, the bulk download of activities did not, after some upload tests (To many at once? Already uploaded? Fit, gpx or tcx files?) I finally narrowed it down to the tcx files and compared them to the individually downloaded files.

Using file compare in Notepad++ the only difference was 10 leading spaces at the beginning of the first line.

After deleting the spaces the file uploaded fine to Garmin Connect.

Now I had thousands of files that need fixing, there was no way I was going to do it manually…

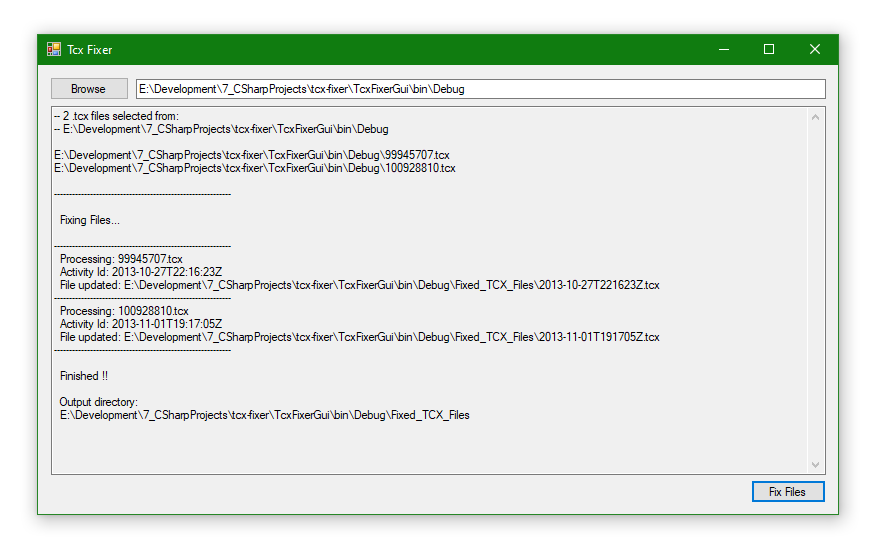
TcxFixerGui

This project provides a basic gui interface for selecting .tcx files and displaying the output whilst processing the files.

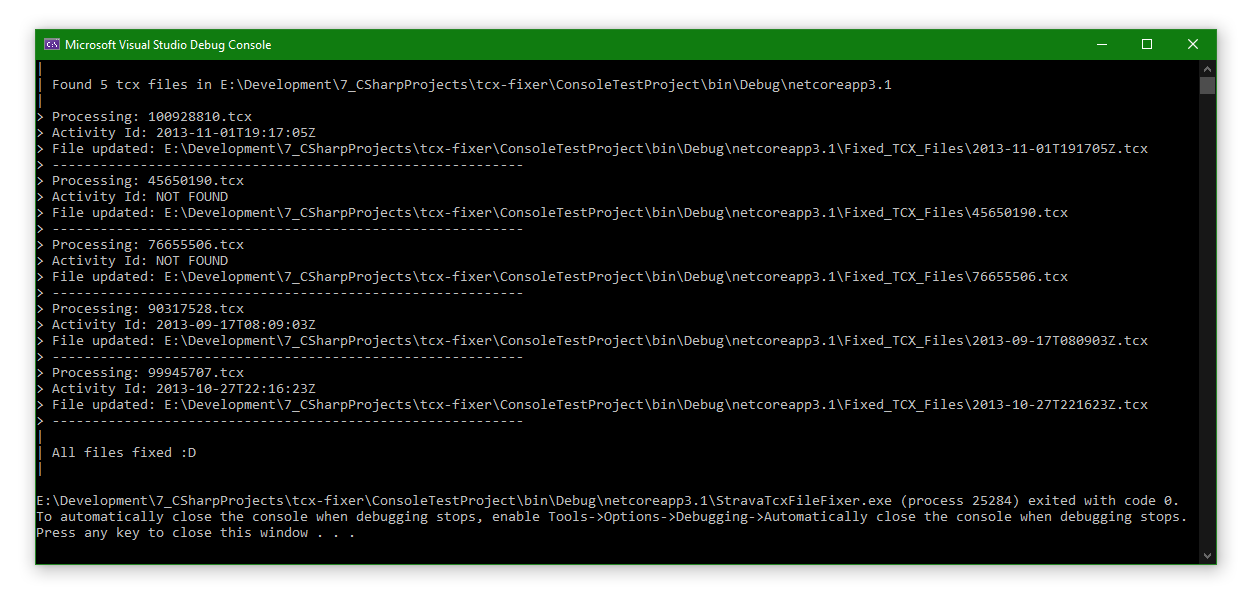
TcxFixerConsole

This was the initial proof of concept project.
Designed to be placed in the directory where your .tcx files are.
It will find all .tcx files with in the current directory, process them and write updated versions to a new directory.

Posting Images to Hexo with Fancybox

Landscape theme uses Fancybox to display photos. Either Markdown syntax or fancybox tag plugin can be used to add photos.

Markdown Tag

The format for displaying images:

1
2
3
4
5
6
7
# MarkDown
![image caption](<path to image> <image title>)
![Meow Cat](/assets/images/2020-10-25/kittycat1.jpg "Image of Cat")

# Fancybox Tag
{% fancybox img_url [img_caption] [img_title] %}
{% fancybox /assets/images/2020-10-25/kittycat1.jpg "Meow Cat" "Image of Cat" %}

However, this is not the standard Fancybox tag syntax, this is a modified version to have different caption text to image title/alt text.
The fancybox.js script was updated as per below…

1
2
3
4
5
6
7
8
9
10
11
// themes/landscape/scripts/fancybox.js

hexo.extend.tag.register('fancybox', function(args){
var original = args.shift();
var caption = args.shift();
var title = args.join(' ');

return '<p><a class="fancybox" href="' + original + '" title="' + title + '">' +
'<img src="' + original + '" alt="' + title + '"></a>' +
(caption ? '<span class="caption">' + caption + '</span>' : '') + '</p>';
});

The resulting markdown image should look like so:

Meow Cat

The resulting Fancybox tag should look like this:

Image of CatMeow Cat

Hello World

Welcome to Hexo! This is your very first post. Check documentation for more info. If you get any problems when using Hexo, you can find the answer in troubleshooting or you can ask me on GitHub.

Quick Start

Create a new post

1
2
3
$ hexo new "My New Post"
or
$ hexo new post "My New Post"

More info: Writing

Run server

1
$ hexo server

More info: Server

Generate static files

1
$ hexo generate

More info: Generating

Deploy to remote sites

1
$ hexo deploy

More info: Deployment